Full chapter reading
Chapter 9: Proper Exercise Technique
Introduction
Proper exercise technique is among the most important components of program design. A proper, progressive, total body, Flexible Linear Periodization approach has little value in the absence of proper exercise technique – they go hand in hand.
It is recommended that prior to viewing the videos, the reader reviews the common characteristics and attributes of proper and improper form discussed in Chapter 4 be reviewed before proceeding. The reader will be directed to the exercise technique videos located at www.MRFInstitute.org.
Feedback and cueing:
When individuals are being trained by a professional trainer, and to ensure proper form for every exercise, it is imperative that the trainer continually provide the client feedback. During the Familiarization Phase (i.e., initial program design), where a primary goal is to teach proper form and assist in developing mind-body connections, the trainer should provide feedback on every set of every exercise. When the client shows proficiency, the feedback can be slightly reduced, but should still occur as a part of every session. In a perfect world feedback should be given every repetition of every set in every session, but this is unrealistic. It is at the trainer’s discretion to determine how often feedback should be given, but generally speaking:
- All sets where primary exercises (cleans, squats, hip hinge [e.g., deadlifts and hip thrusts], push, pull, and press) are being performed, feedback should be included.
- All sets with moderate to heavy loads (i.e., 1 to 8 repetition range) taken to “at or near” muscle failure should include regular feedback.
- Complex, multi-joint, metabolically fatiguing exercises require regular feedback.
- When the trainer notices a break or a potential break in form, feedback should be provided.
- When a trainer notices a lack of focus feedback should be provided.
Trainer Feedback Decision Flow
- 1Watch the set
- 2Identify the movement-quality need
- 3Select verbal, tactile, visual, or technology feedback
- 4Cue without disrupting safety or focus
- 5Reassess the next repetition or set
This flow supports the feedback paragraph above. It does not replace the source wording.
Types of Cueing Feedback
Types of feedback include kinesthetic (internal – such as the feeling of a stretch or holding a weight) and tactile (external – such as touching a body part to help provide a mind-body connection):
- Verbal –kinesthetic.
- Touching – tactile.
- Visual (e.g., the use of mirrors and video) – kinesthetic.
- Other technology (e.g., accelerometers) – kinesthetic and tactile.
Cueing Feedback Types
Use these categories as a quick review after reading the source cueing-feedback section.
Verbal
Kinesthetic feedback delivered through spoken coaching cues.
Touching
Tactile feedback used to support a mind-body connection when appropriate.
Visual
Kinesthetic feedback through mirrors, video, and movement observation.
Technology
Feedback tools such as accelerometers that can provide kinesthetic and tactile information.
Common examples of verbal cues include:
- “Initiate the movement from” the prime mover(s).
- “Lift with velocity, lower with control.”
- “Retract your chin to keep your neck in line with your spine.”
- “Maintain your natural shoulder slope and keep your neck as relaxed as possible.”
- “Chest out, shoulders back.”
- “Watch your hips in the mirror and don’t allow yourself to shift to the side.”
- “Maintain a mind-body connection with your feet and don’t allow your body weight to shift to your forefoot.”
Tactile cues
Tactile cues are appropriate in certain situations (e.g., tapping a client’s latissimus dorsi to remind them to focus on that muscle group during rowing exercises), and inappropriate in certain situations (i.e., a trainer should never tap a client’s glutes in any situation). It is at the trainer’s discretion when to use tactile cues, and to understand that they are an important component of feedback that should not be overlooked or disregarded.
Visual cueing
Whenever possible and appropriate, visual cueing in the form of mirrors and video feedback should be provided to the client, especially with multi-joint, primary exercises. Slow motion and normal speed video feedback can be invaluable, especially with exercises or particular angles where the client could not otherwise see themselves.
Common characteristics of primary lower body exercises, and pull and press movements:
More details will be provided within the corresponding videos found at www.MRFInstitute.org, but for clarity and ease of understanding the concept of proper form it is important to understand some common characteristics. For example:
Lower body multi-joint exercises:
When performing all multi-joint lower body exercises (i.e., squats, deadlifts, hip thrust, multi-directional lunge, leg press):
- At the foot-ankle complex, there should be little to no frontal plane (i.e., side-to-side) movement. The foot and ankle should be stable, and all movement should occur in the sagittal plane (front-to-back).
- Weight distribution at the foot should never shift toward the forefoot. Individuals should be instructed to lower body weight toward the mid-to-hindfoot and to drive the mid-to-hindfoot into the ground to ascend back into starting position.
- There should be little to no frontal plane movement at the knee during the exercise.
- In most cases, depth should be maximal, as determined by hip mobility and the ability to maintain a neutral lumbar spine. The “butt wink” should generally be avoided.
- The core should be braced, spine neutral, chest out, and shoulders back.
Lower-Body Technique Checklist
This checklist restates the lower-body source characteristics as quick review checkpoints.
Foot and ankle
Little to no frontal-plane movement; stable foot and ankle.
Weight distribution
Avoid shifting toward the forefoot; drive through the mid-to-hindfoot.
Knee control
Little to no frontal-plane knee movement during the exercise.
Depth
Use maximal depth as allowed by hip mobility and neutral lumbar spine.
Brace and posture
Core braced, spine neutral, chest out, and shoulders back.
Multi-joint rowing and chest press movements:
No matter the body position, whether standing, sitting, kneeling, lying, or suspended (i.e., suspension rows or presses), the exerciser should:
- Maintain a neutral chin (approximately 10 degrees of cervical extension or flexion is acceptable in most situations, providing the neck is not strained).
- Avoid forward head posture (retract the chin).
- Maintain natural shoulder slope (shoulders should not move towards the ear during the exercise).
- “Super-glue” the torso in space so that the only the arms are moving during the exercise.
- During chest press exercises, the exerciser should avoid abducting the shoulder beyond 70 degrees (i.e., avoid flaring the upper arm away from the torso excessively) and to avoid going beyond a depth of 110 degrees of shoulder horizontal abduction.
Pull and Press Technique Checklist
Use this supplemental checklist after reading the source rowing and chest press characteristics.
Neutral chin
Maintain a neutral chin while keeping the neck unstrained.
Forward head posture
Avoid forward head posture by retracting the chin.
Shoulder slope
Maintain natural shoulder slope rather than shrugging toward the ears.
Stable torso
Keep the torso fixed so the arms are the moving segments.
Chest press position
Avoid excessive shoulder abduction and excessive press depth.
While the reader is directed to instructional videos as the primary source to learn proper exercise technique (www.MRFInstitute.org), below are pictures of common exercises and basic descriptions of proper form. Figure 9.1 Proper Technique for Various Exercises.
Figure 9.1: Proper Technique for Various Exercises.
Barbell Squat
Barbell Squat
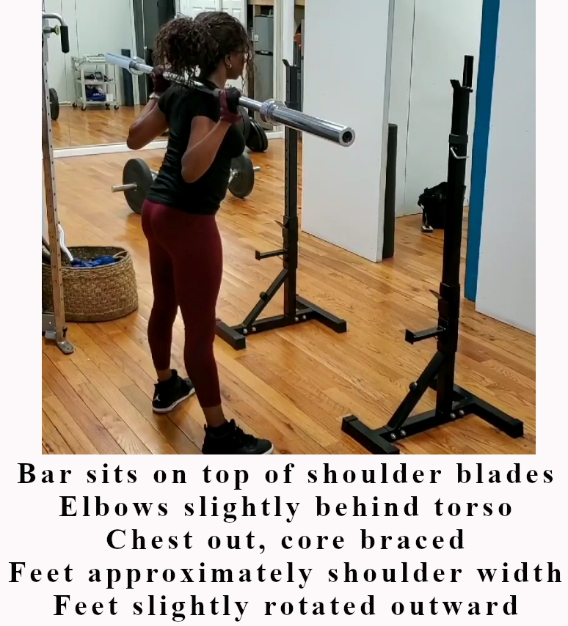
Barbell squat setup
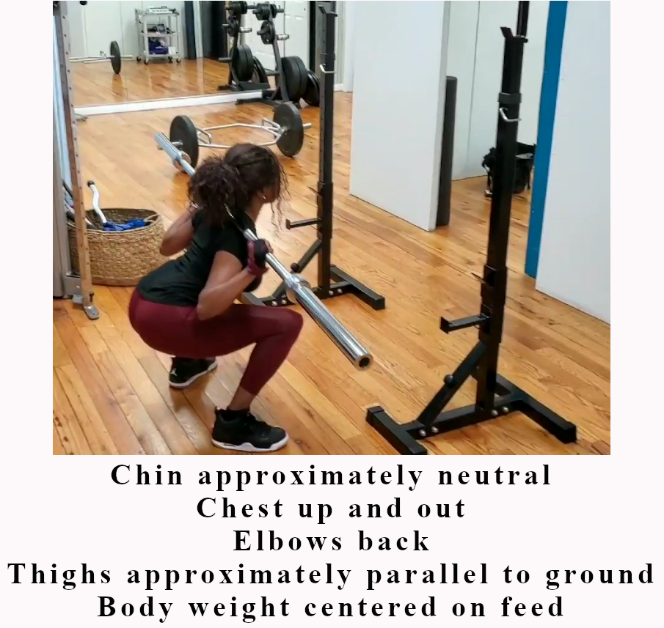
Barbell squat lowered position
Barbell Deadlift
Barbell Deadlift
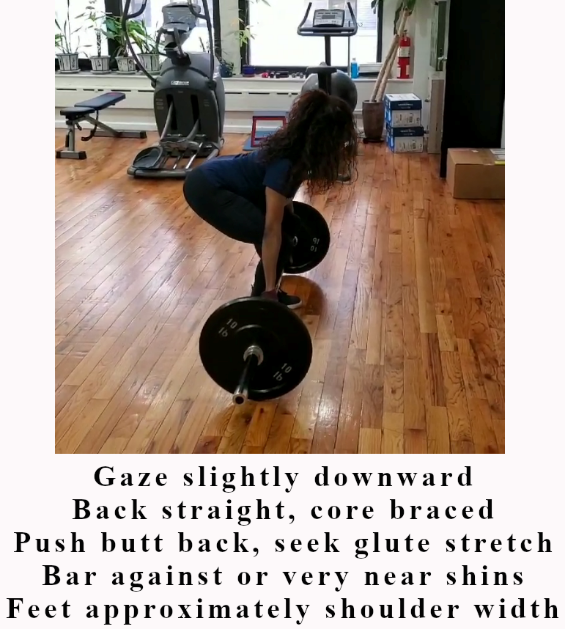
Barbell deadlift starting position
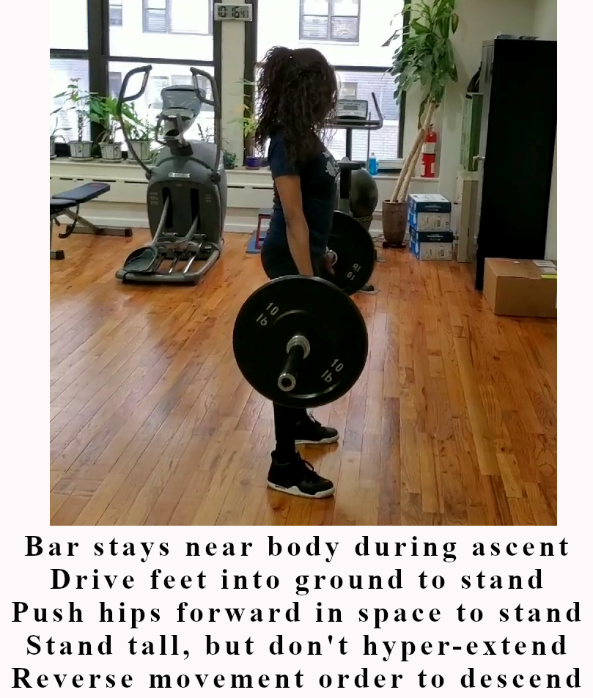
Barbell deadlift standing position
Lunge
Depending on type of lunge, push forward, backward, or vertically, with front foot and leg to ascend back into starting position
Lunge
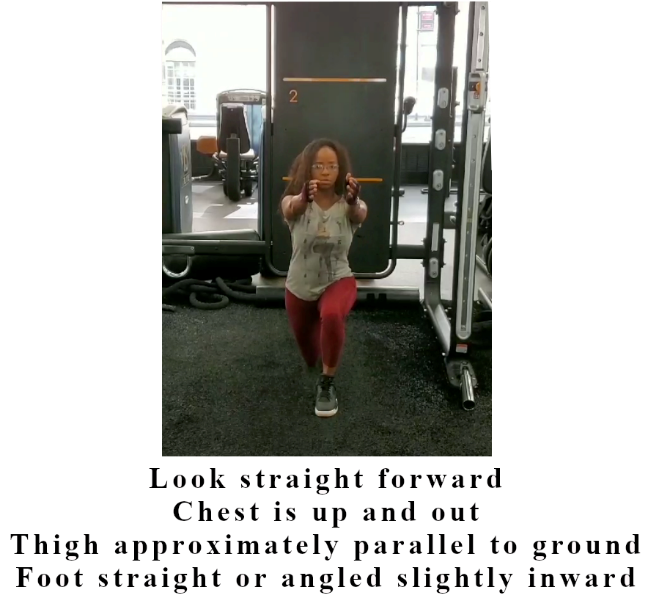
Lunge setup
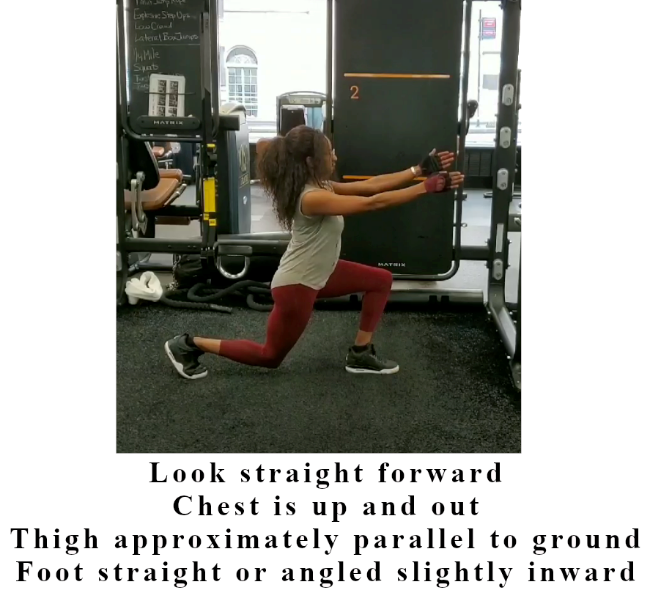
Lunge lowered position
Lat Pulldown
Lat Pulldown
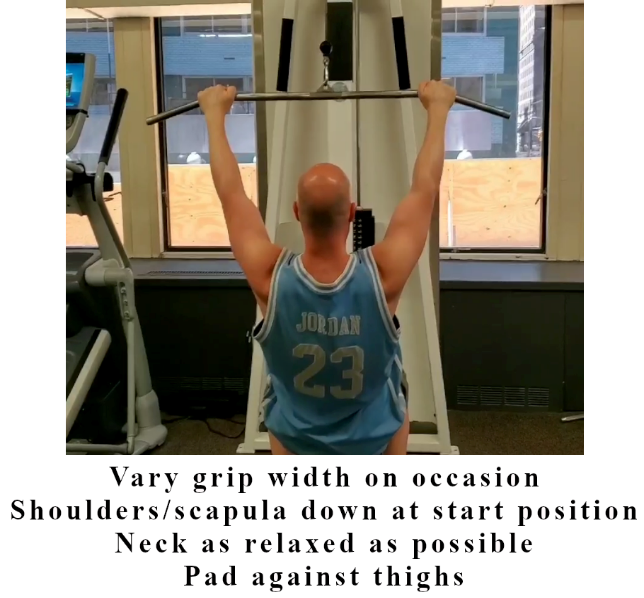
Lat pulldown start
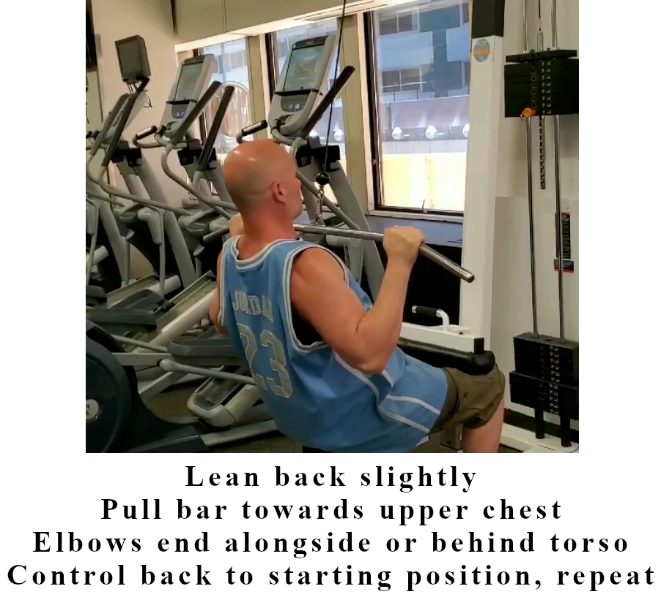
Lat pulldown pull
Barbell Row
Barbell Row
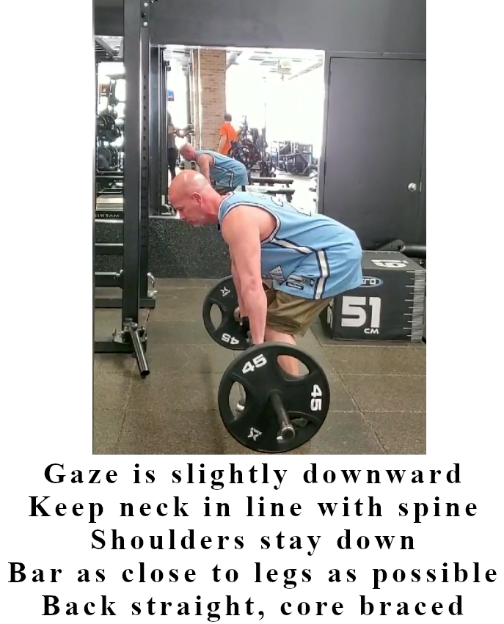
Barbell row setup
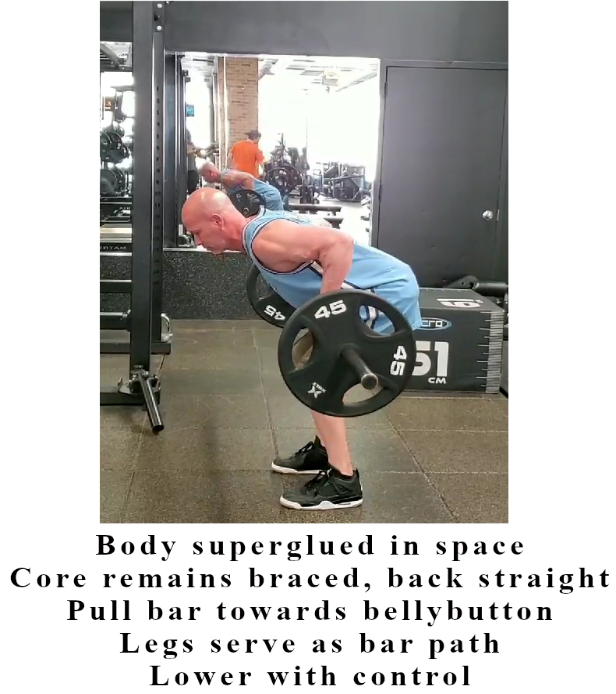
Barbell row pull
Dumbbell Chest Press
Dumbbell Chest Press
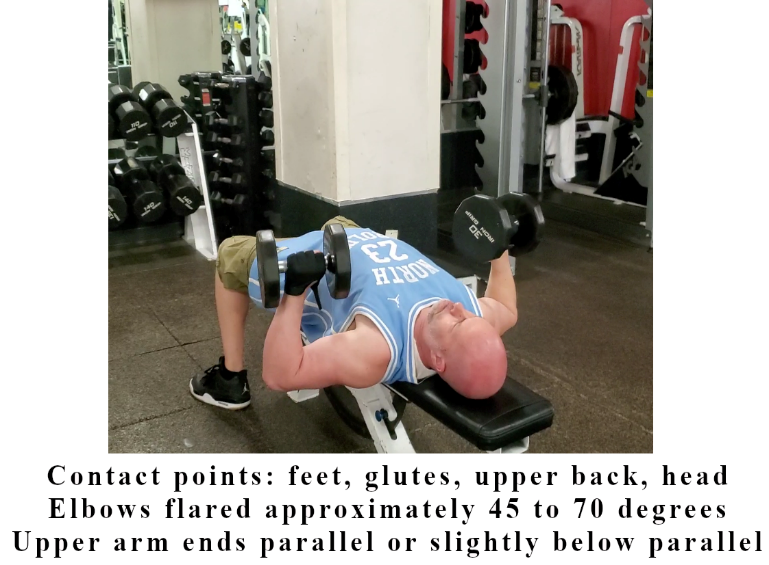
Dumbbell chest press lowered position
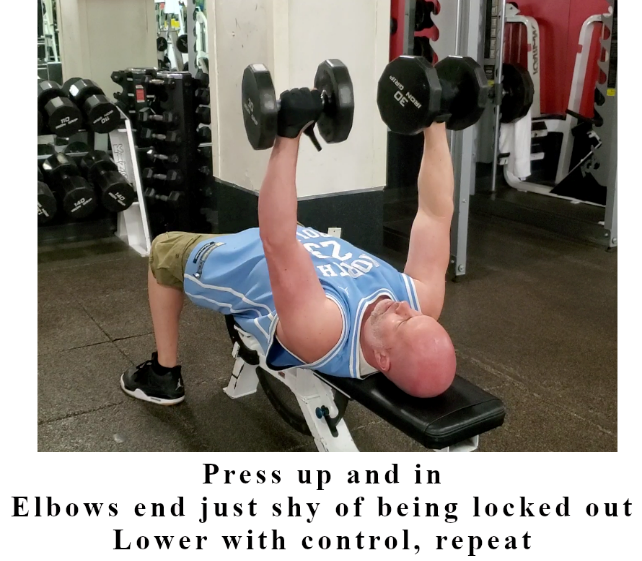
Dumbbell chest press extended position
Shoulders
Shoulders
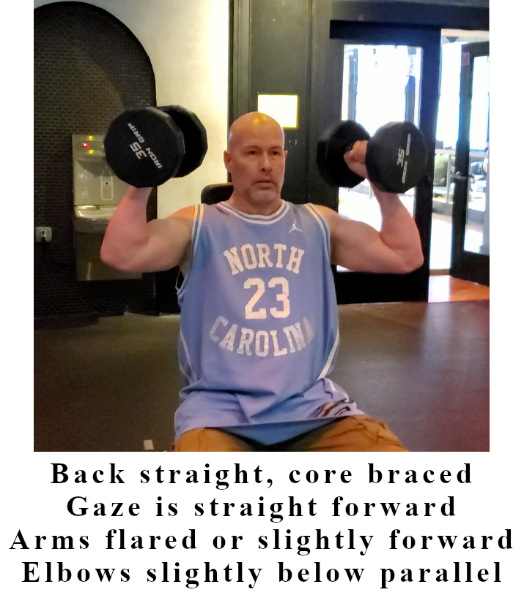
Shoulder press start
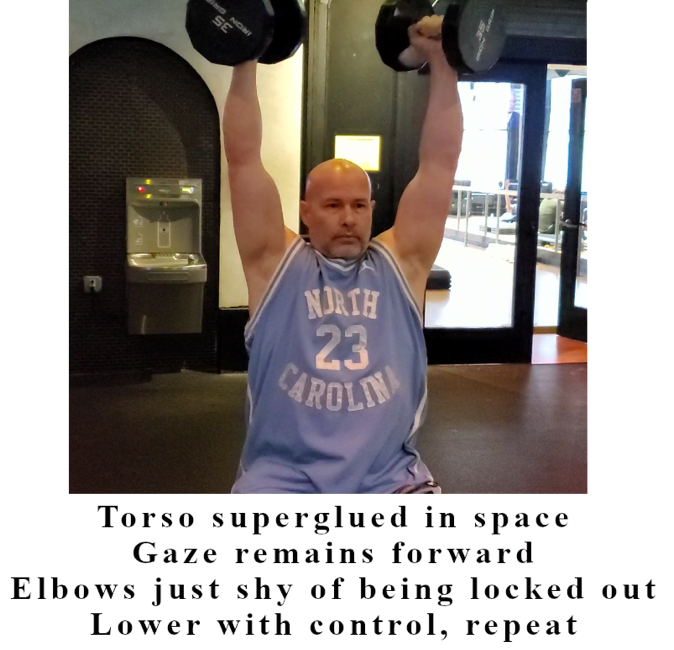
Shoulder press extended position