Full chapter reading
Chapter 7: Trigger Point Release and Flexibility Assessment and Program Design
(Assess, Initiate & Progression)
Introduction
Flexibility and trigger point release are integral to movement efficiency and joint health. This chapter outlines assessment and training methods that complement the universal algorithm, supporting overall fitness and recovery.
Section 1: Trigger Point Assessment and Program Design
Trigger point release, also known as self-myofascial release, can reduce pain, improve blood flow, increase joint range of motion, and improve efficiency of movement (Beardsley, 2015). These improvements occur through both direct and indirect mechanisms.
A primary mechanism which leads to the acute improvement in flexibility following a trigger point session is release in neural tension (Beardsley, 2017). Studies have shown that the combined use of trigger point release and flexibility training may lead to greater improvements in flexibility over time, therefore both programs are recommended. Contrary to previous claims, the use of tools for trigger point release such as foam rollers and lacrosse balls do not release adhesions or break up scar tissue.
While there is limited research supporting the use of trigger point release programs to reduce muscle and myofascial pain, the ubiquity of its use in physical therapy settings suggests, at least anecdotally, that there is value to individuals.
Assessment
Prior to designing a trigger point release program for the person an assessment must be performed to individualize the program to their needs. A careful screen to determine previous or current musculoskeletal injuries is important, as it can confound the trigger point assessment. Being aware of those areas ahead of time is important so that they are not inappropriately identified as trigger points.
The purpose of the assessment is to seek out trigger points throughout the body which are causing the most discomfort to the individual. These are the trigger points the person will concentrate on when performing trigger point release.
Step 1: It is at the discretion of the fitness professional or individual to determine how they would like to perform the initial assessment. Anecdotally, it seems to work well to assess half of the body at the start of the initial training session and the other half of the body at the start of the second training session.
Individuals should be instructed to roll the tool (e.g., foam roller, lacrosse ball, tennis ball, or thera-cane) over each affected area for about five seconds before providing feedback as to whether they feel any “bruise-like discomfort,” as this is an accurate description of the pain-pressure a person will feel. Just as a fresh bruise tends to be more painful than one that’s already healing, certain trigger points may cause more discomfort than others when pressure is applied.
If the person rolls an area for approximately five seconds and feels no trigger points they can move on to the next area. If the person does feel a trigger point the following question must be asked, “On a 1 to 10 scale, with “10” being maximum discomfort (i.e., excruciating) how uncomfortable did that trigger point feel?” The areas should be noted where the person answered a “3” or above and those are the areas that should be emphasized first. The greater the discomfort, the higher the priority should be to perform trigger point release on that area.
Trigger Point Assessment Workflow
- 1Screen for current or previous musculoskeletal injuries
- 2Roll each area for about five seconds
- 3Ask for a 1 to 10 discomfort rating
- 4Prioritize areas rated 3 or above
- 5Emphasize the highest-discomfort trigger points first
Use the workflow as a memory aid after reading the preserved assessment wording above.
Trigger Point Prescription Considerations and Guidelines
After the assessment has been performed and the location of trigger points have been noted, an appropriate program can be developed using the Frequency, Intensity, Time, and Type (FITT) Principle:
Frequency
Initially, trigger point release should be performed most days of the week to address areas of discomfort effectively. However, the rate at which discomfort decreases can vary significantly from person to person. Some individuals may experience a noticeable reduction in discomfort over time, while others may not see as much improvement initially.
For those with moderate trigger points (e.g., a 4–6 on a 1 to 10 discomfort scale), a higher frequency of release—five to seven days per week—can be especially beneficial. This consistent approach may be necessary for several weeks before significant relief is achieved. Conversely, individuals with milder trigger points (e.g., a 2–3 on the scale) may not require such frequent sessions, as their discomfort level is less pronounced.
As discomfort decreases over time, the frequency of trigger point release can be gradually reduced. For example, after achieving noticeable improvements, a person might transition to performing trigger point release two to three times per week. Eventually, the goal is to establish a "muscle tissue maintenance" routine, where release is performed just one to four times per month.
In theory, trigger point release should never be completely discontinued, as trigger points can reappear due to factors such as aging, repetitive movements, injuries, or other stressors. Maintaining a consistent, albeit less frequent, release schedule can help prevent the recurrence of trigger points and support overall muscle health.
Neural tension and the associated trigger points may lead to a reduction in range of motion around joints and a decrease in efficiency of movement. The “tighter” a person is, the more volume of trigger point release they may need. One way to increase volume is to increase frequency. Therefore, for areas of restricted movement it is suggested that the individual perform trigger point release more frequently.
Intensity
Using a 1 to 10 discomfort scale, with “1” corresponding with very little discomfort and “10” corresponding with “excruciating pain,” it is recommended that the person vary the pressure they’re using so that they experience “moderate discomfort,” corresponding with a 4 to a 6 on that scale. (Cheatham, 2018). It is subjective and specific to each individual. For those using a fitness professional’s services, the individual must seek out their own trigger points, as the fitness professional cannot possibly know exactly where the trigger point is or how much pressure to use. It is also why fitness professionals should not roll the client themselves.
Time or Duration
After briefly rolling an entire muscle group (e.g., pectorals, quadriceps, calves), the most sensitive trigger points should be rolled for a minimum of 20 to 30 seconds and a maximum of several minutes (Cheatham, 2015). The tool being used should be pressed directly into the trigger point with no movement or used to “oscillate” or “floss” the trigger point with very small movements. The individual should not perform a “massage” on the area by continuously rolling the entire area, as this will defeat the purpose.
Type
This refers to the type of tool being used, such as a foam roller, lacrosse ball, tennis ball, or thera-cane.
While there are many types of tools, there are only two differences between one and another:
- The amount of surface area.
- The density (hardness vs softness) (Curran, 2008).
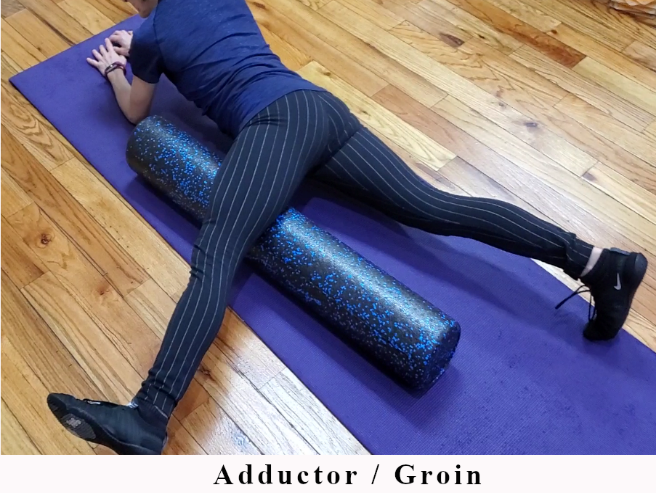
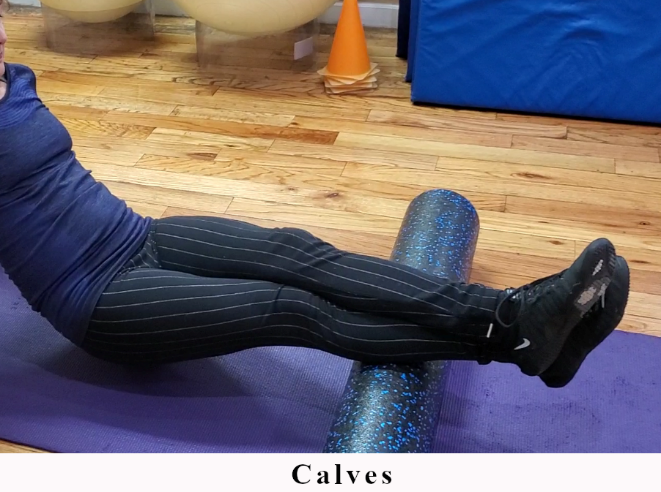
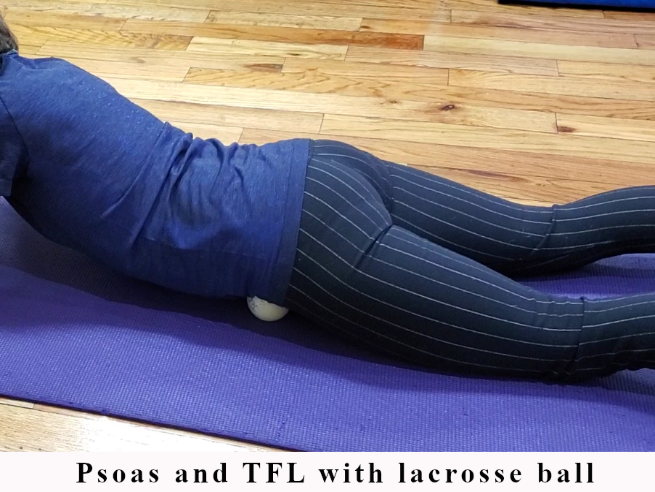
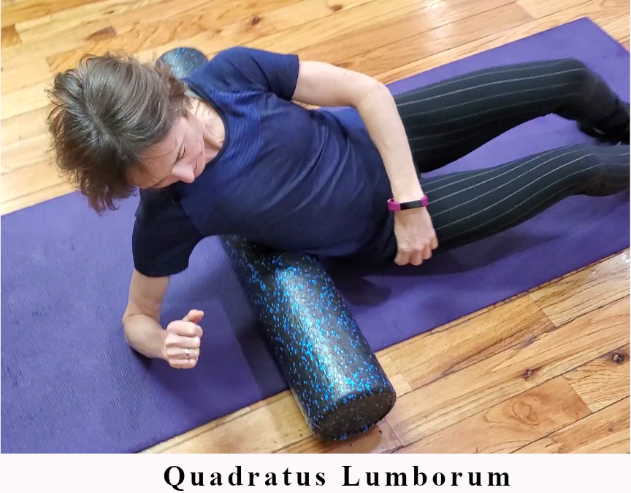
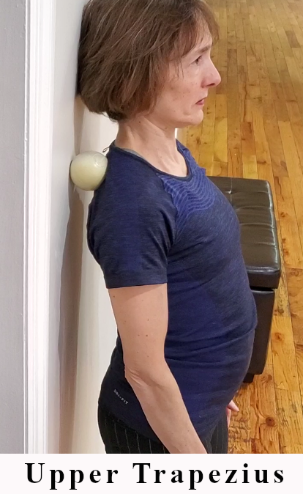
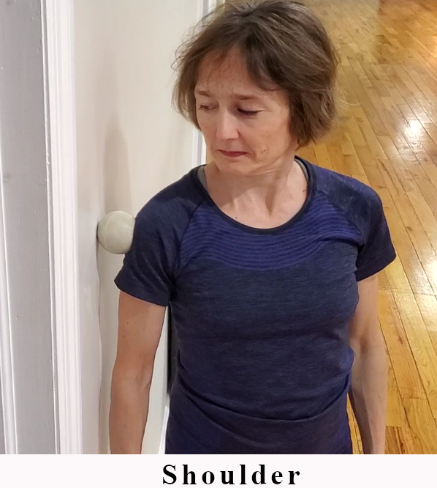
A harder tool with less surface area such as a lacrosse ball will provide greater pressure to an area than a tool that is softer with less surface area, such as a foam roller. This concept can be used to progress or regress from one tool to another (Cheatham, 2018). For example, if an individual doesn’t feel much discomfort with the use of a foam roller, they can progress to the use of something harder, such as a lacrosse ball. Or if a harder tool causes too much discomfort, they can regress to using a softer tool with more surface area. Different tools can be experimentally used in different areas of the body to learn what is most appropriate for each area. Having said that, suggestions for tools that are usually appropriate for various body parts for most people can be seen in Table 7.1, with example images in Figure 7.1.
Tool Progression: Surface Area and Density
Regress pressure
Use more surface area or a softer tool when pressure is too uncomfortable.
- Foam roller
- Softer tool
- Larger contact area
Progress pressure
Use less surface area or a harder tool when the person does not feel much discomfort.
- Lacrosse ball
- Harder tool
- Smaller contact area
Table 7.1: Trigger Point Release Tool Suggestions by Body Part
| Body Part | Tool |
|---|---|
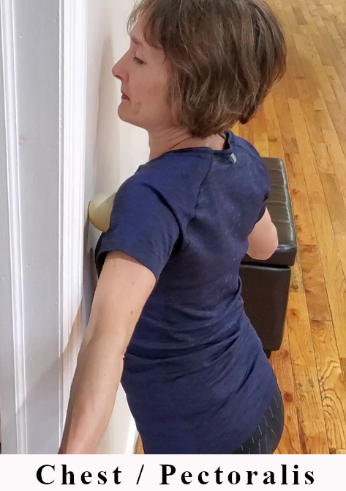
| Pectoralis, Pectoralis minor | Lacrosse ball |
| Deltoid (anterior, lateral, posterior) | Lacrosse ball |
| Upper trapezius | Lacrosse ball, Thera-cane |
| Spinal erectors | Tennis ball |
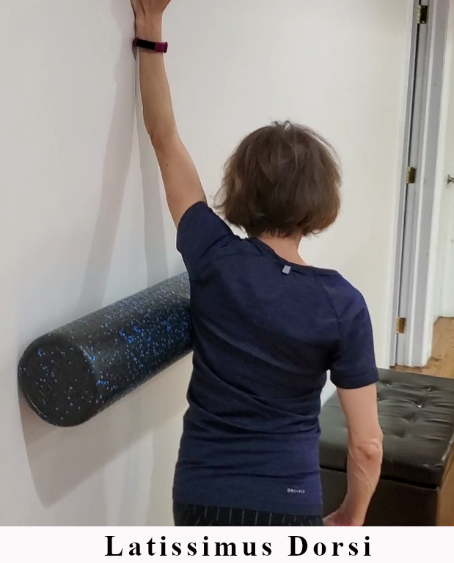
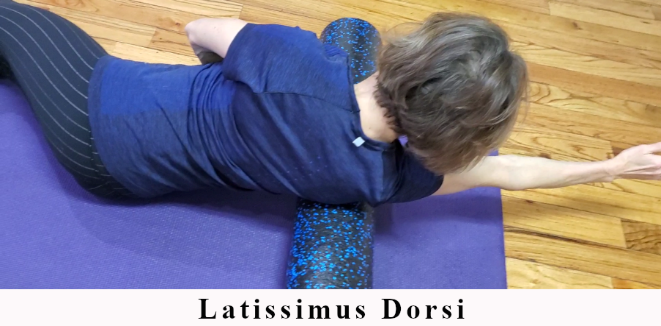
| Latissimus dorsi and Serratus anterior | Foam roller |
| Quadratus lumborum | Lacrosse ball, Foam roller |
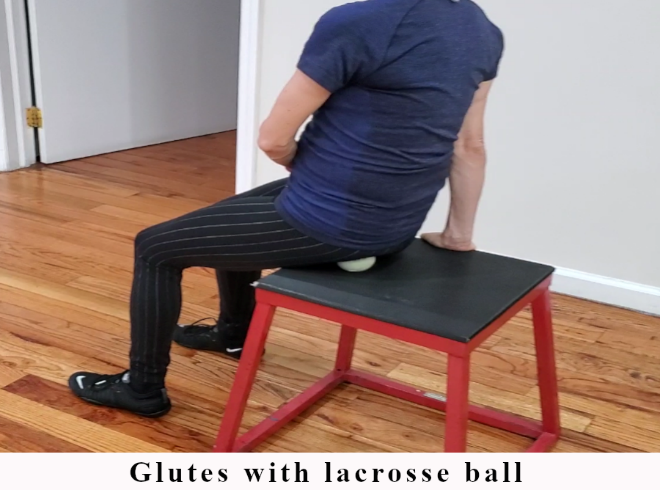
| Gluteus maximus and Gluteus medius | Lacrosse ball |
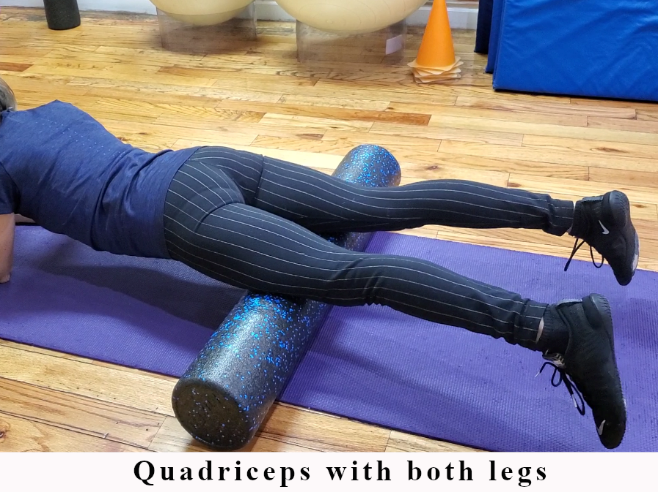
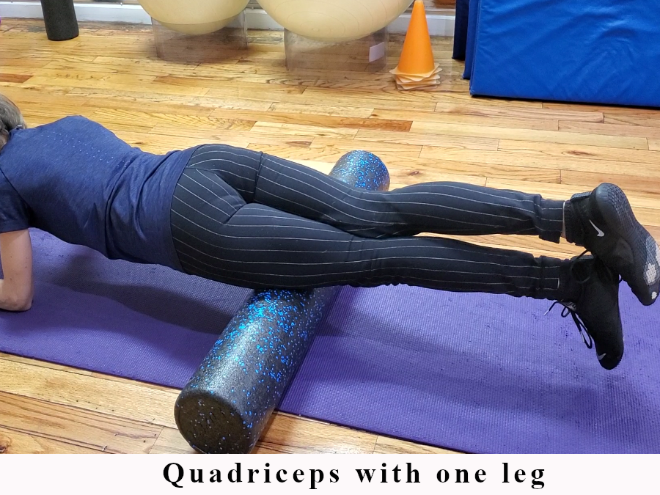
| Quadriceps | Foam roller (try single leg first) |
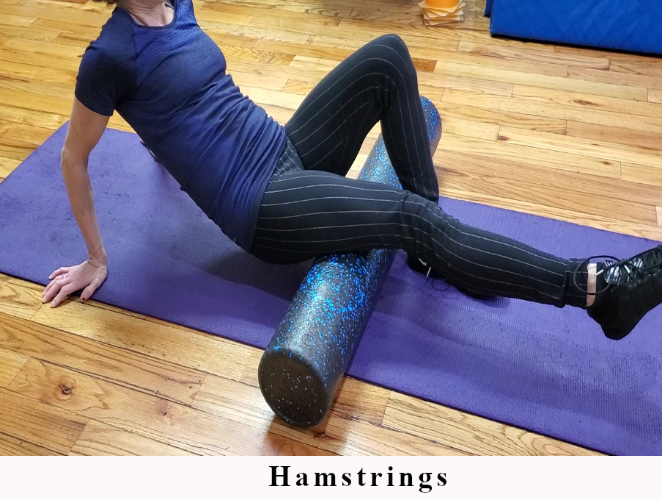
| Hamstrings | Olympic bar, Foam roller |
| Adductors | Olympic bar, Foam roller |
| IT Band | Foam roller |
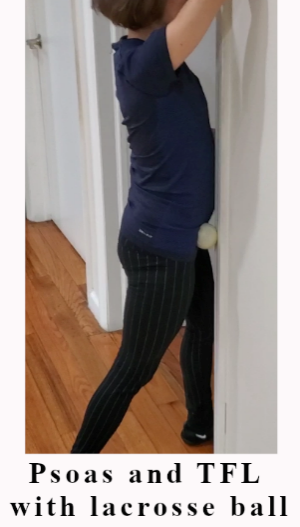
| Psoas and Tensor Fasciae Latae | Lacrosse ball |
| Calves | Foam roller |
Figure 7.1: Trigger Point Release Examples
Example 1
Example 2
Example 3

Example 4
Example 5
Example 6
Example 7
Example 8
Example 9
Example 10
Example 11
Example 12
Example 13
Example 14
Example 15
Additional Considerations
There are certain areas of the body and situations where trigger point release is contraindicated. These include:
- Areas where skin conditions exist, such as eczema and psoriasis.
- Areas where varicose veins exist.
- The abdominal area.
- The neck.
- Areas with little soft tissue directly overlying bone (i.e., patella)
- If there are feelings of numbness or tingling. This generally indicates that a nerve is being compressed and should be avoided, and potentially evaluated by a medical professional.
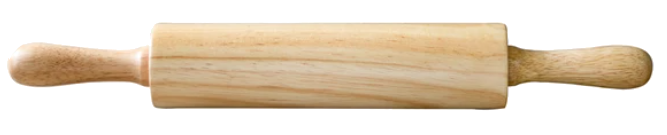
For individuals living with obesity or those who have difficulty getting down to or up from the floor, standing against a wall and using a tool placed between their body and the wall can provide effective pressure. Another option is to sit and use a tool known as “The Stick” or something similar, such as a dough roller (Figure 7.2).
Section 2: Flexibility Assessment and Program Design
Introduction
Flexibility is defined as, “the available range of motion around a joint.” Flexibility is a component of fitness, can be improved with training, and is necessary for efficiency of movement (Garber, 2011). Lack of flexibility may be associated with injury and flexibility may decrease over time (de la Motte, 2019). Therefore, a properly designed exercise program includes the assessment of joint range of motion and flexibility training where indicated.
Assessment
Joint range of motion falls within one of three categories:
- Normal
- Hypermobile (loose)
- Restricted (tight)
Joint Range of Motion Categories
Normal
The joint range is within the expected range.
Hypermobile (loose)
The joint has more range than expected and should not be stretched further.
Restricted (tight)
The joint has limited range and may be addressed with flexibility work where appropriate.
The body naturally strives for homeostasis, including balanced flexibility around each joint. To achieve this, the range of motion for each major joint should be assessed by a qualified fitness professional or through self-assessment, such as active range of motion testing. This assessment helps identify whether a joint is normal, hypermobile, or restricted. With this information, a tailored flexibility training program can be designed to restore or maintain optimal balance around each joint.
During the assessment, in addition to identifying whether movement is normal, hypermobile, or restricted, the fitness professional should also note any asymmetries, as well as areas of pain, discomfort, or apprehension.
Table 7.2 provides a reference for the range of motion at each major joint, serving as a tool for fitness professionals to learn and memorize. By understanding these ranges, professionals will be equipped to perform joint range of motion assessments confidently and objectively, accurately identifying whether a joint's movement is normal, hypermobile, or restricted.
Table 7.2: Joint Ranges of Motion
| Joint | Degrees |
|---|---|
| Hip | |
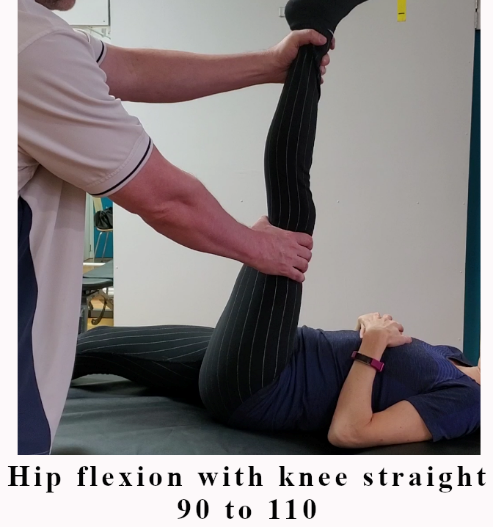
| Flexion (with knee straight) | 90 to 110 |
| Flexion (with knee bent) | 120 to 140 |
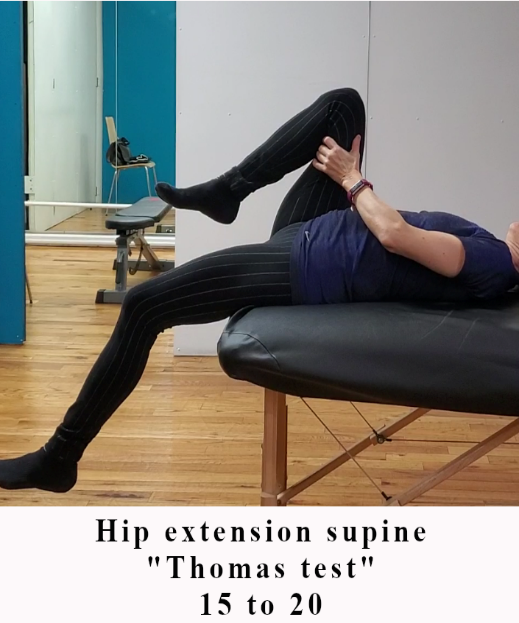
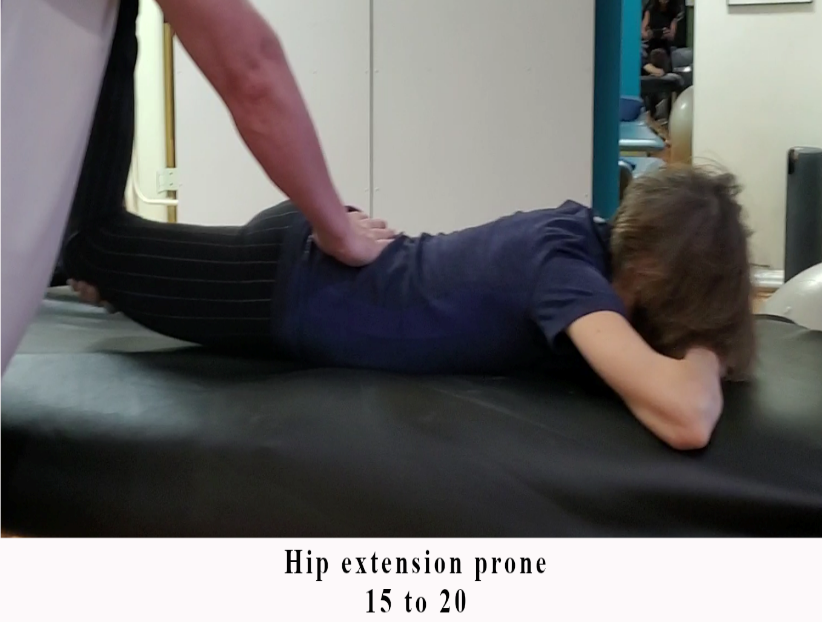
| Extension | 15 to 20 |
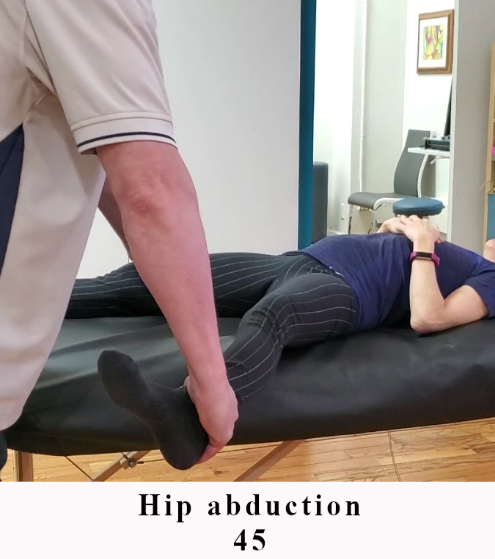
| Abduction | 45 |
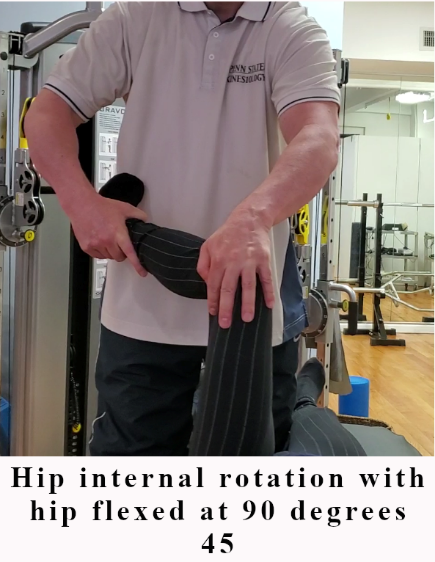
| Internal Rotation | 45 |
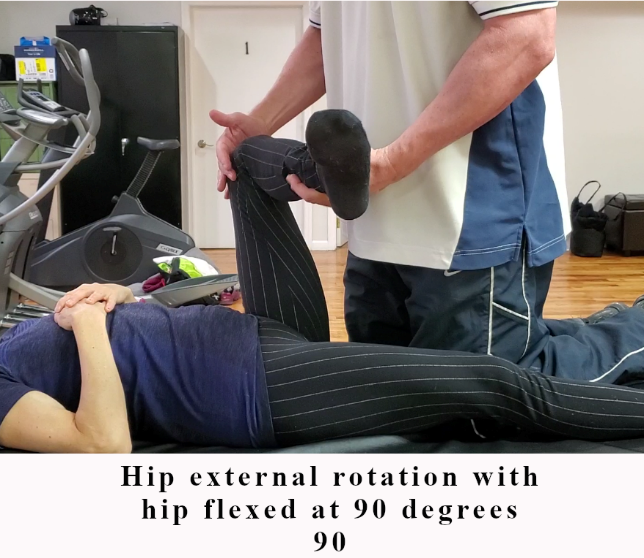
| External Rotation (at 90 deg of flexion) | 90 |
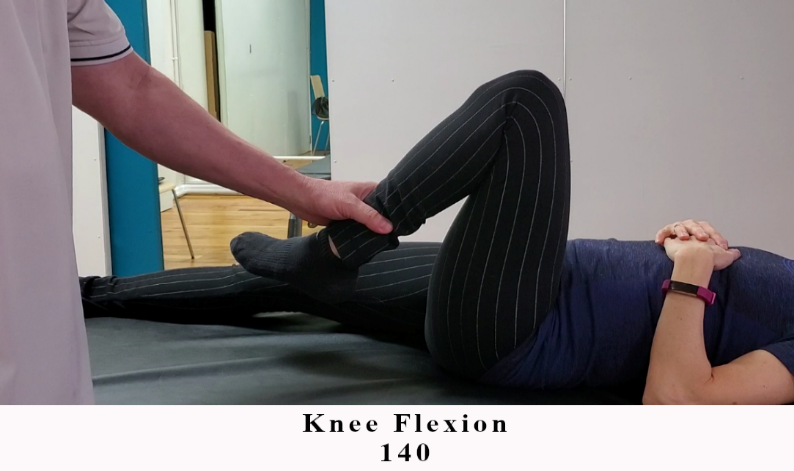
| Knee | |
| Flexion | 140 |
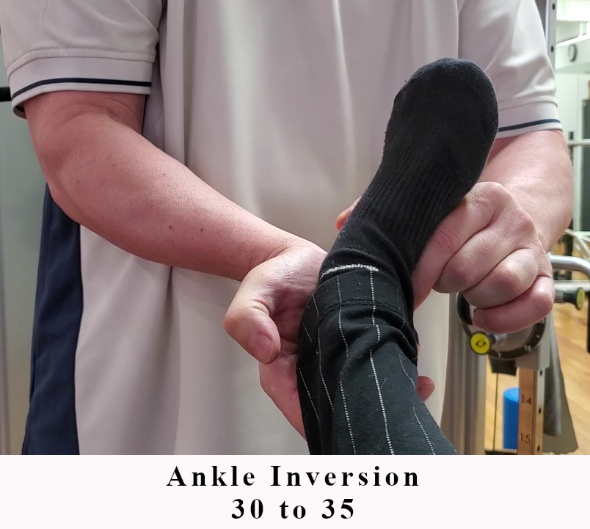
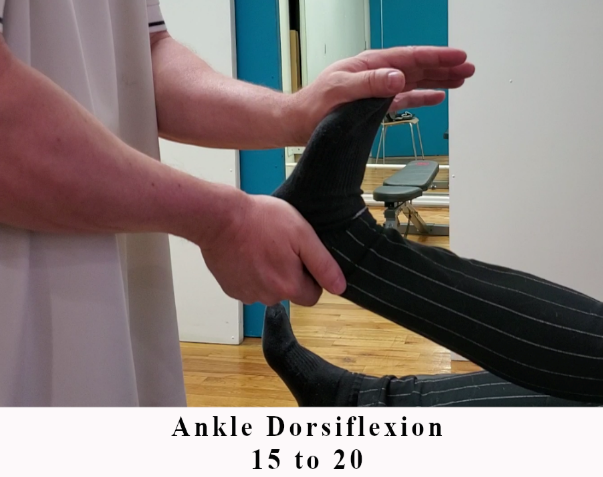
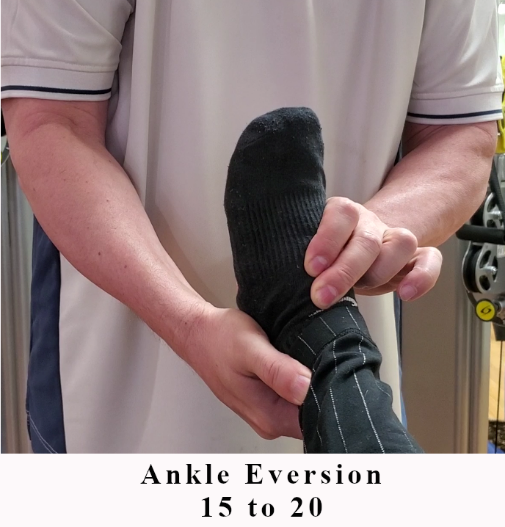
| Foot/Ankle | |
| Ankle Dorsiflexion | 15 to 20 |
| Ankle Inversion | 30 to 35 |
| Ankle Eversion | 15 to 20 |
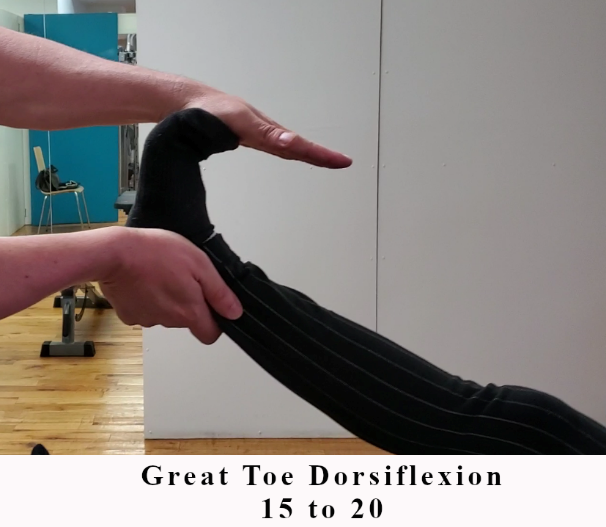
| Great Toe Dorsiflexion | 70 to 90 |
| Shoulder | |
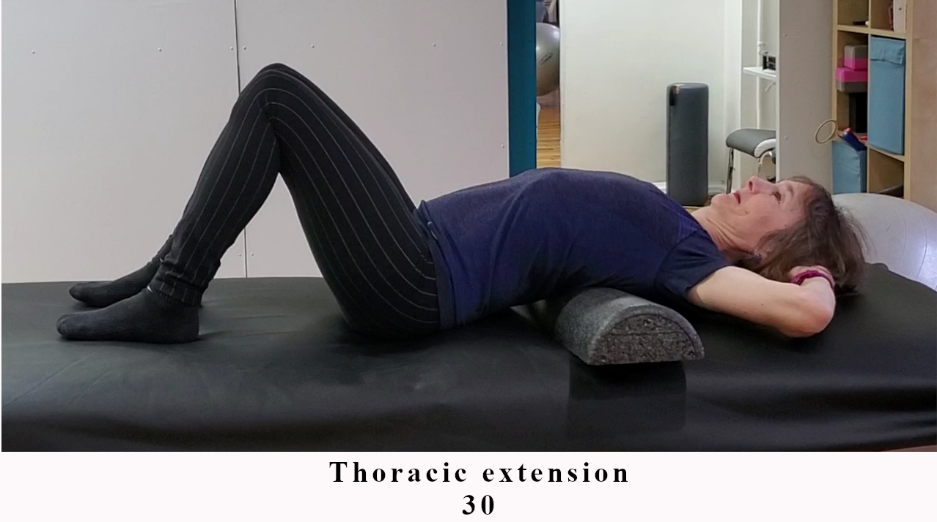
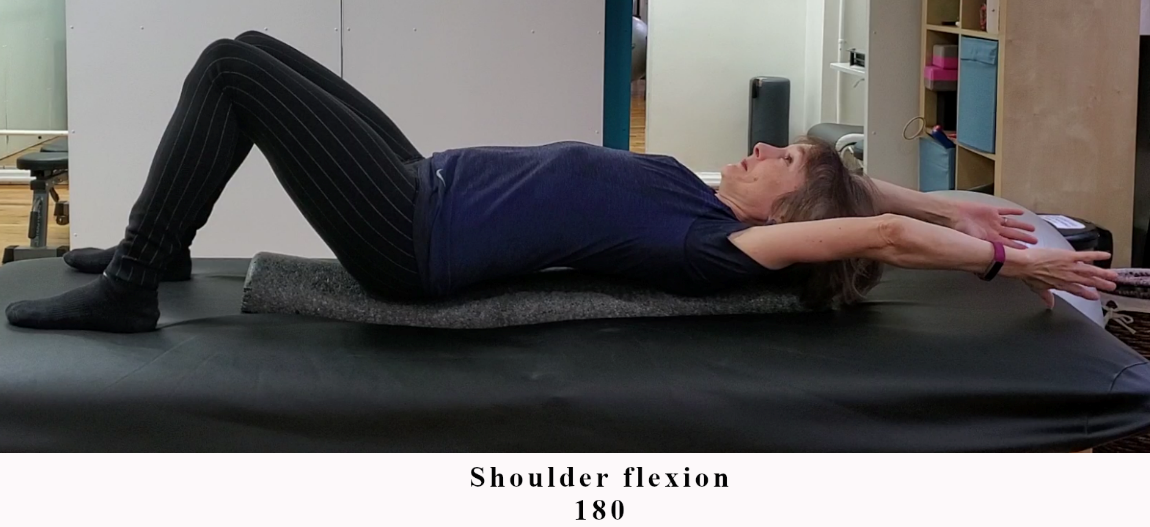
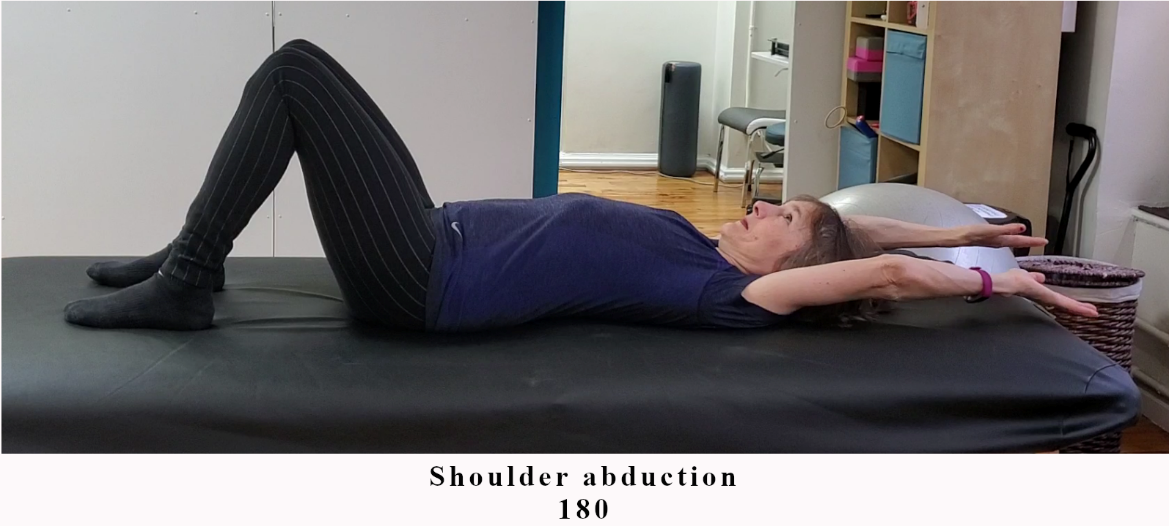
| Flexion | 180 |
| Extension | 45 to 50 |
| Abduction | 180 |
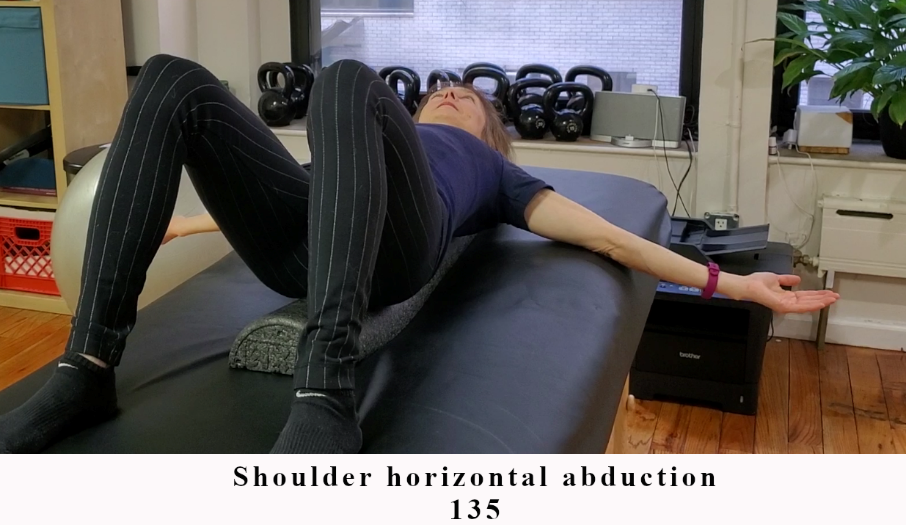
| Horizontal Abduction | 135 |
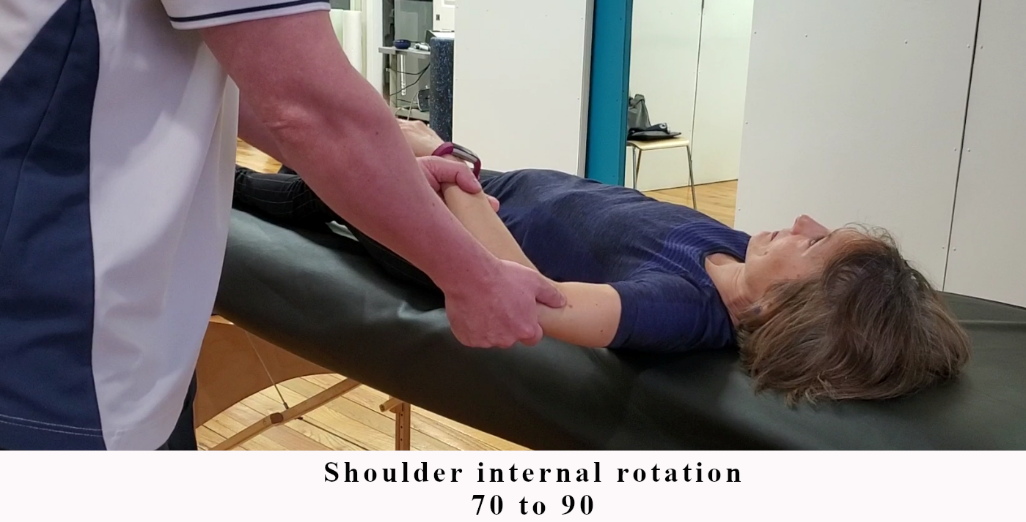
| Internal Rotation | 70 to 90 |
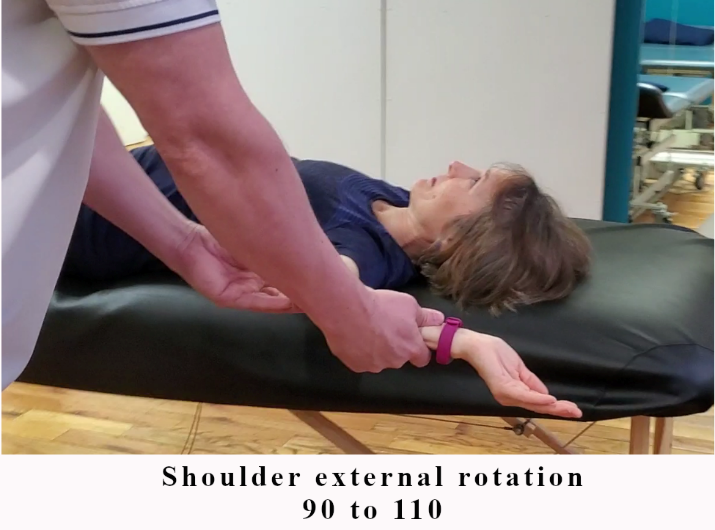
| External Rotation | 90 to 110 |
| Cervical/Neck | |
| Flexion | 45 to 50 |
| Extension | 50 to 60 |
| Lateral Flexion | 45 |
| Rotation | 70 to 80 |
| Thoracic Spine | |
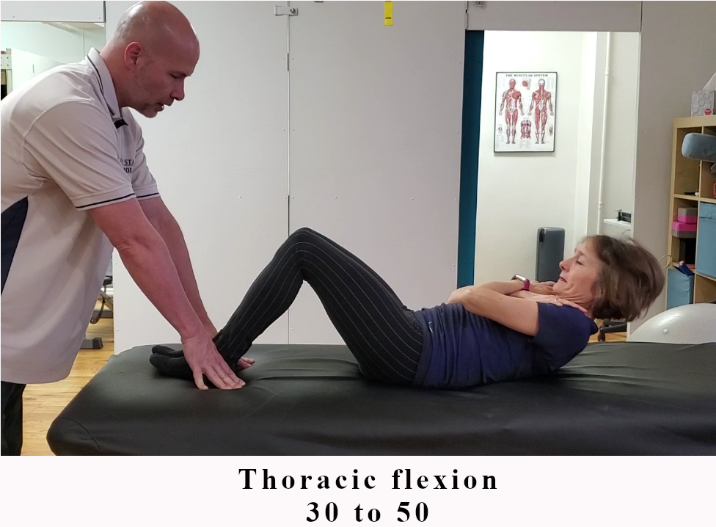
| Flexion | 30 to 50 |
| Extension | 30 |
| Lateral Flexion | 30 to 35 |
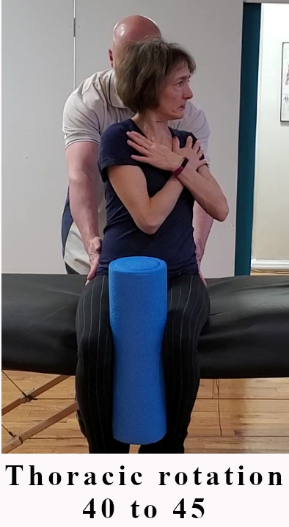
| Rotation | 40 to 45 |
The images below offer examples of joint range of motion assessments; however, for a more comprehensive demonstration, readers are encouraged to visit the associated videos available at www.MRFInstitute.org.
Figure 7.3: Foot, Ankle, Knee, Hip, Spine, and Shoulder Joint Range of Motion
Foot / Ankle
Foot / Ankle 1
Foot / Ankle 2
Foot / Ankle 3
Foot / Ankle 4
Knee
Knee
Hip
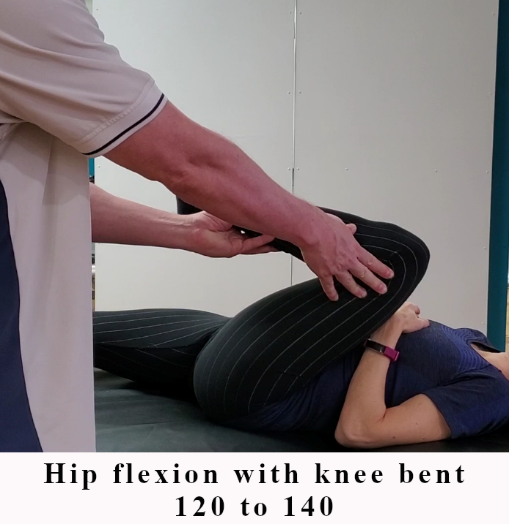
Hip 1
Hip 2
Hip 3
Hip 4
Hip 5
Hip 6
Hip 7
Spine
Spine 1
Spine 2
Spine 3
Shoulder
Shoulder 1
Shoulder 2
Shoulder 3
Shoulder 4
Shoulder 5
After assessing joint ranges of motion, a flexibility program should be designed with the following considerations:
- Avoid stretching hypermobile areas: Stretching joints that are already hypermobile can exacerbate instability and should be avoided.
- Maintain normal joint range of motion: For joints with normal flexibility, stretching should aim to preserve this balance. This is accomplished by gently stretching to the initial "end range," the natural stopping point of joint movement defined by flexibility limits and soft tissue extensibility. Hold each stretch for 20 to 60 seconds, taking care not to push beyond this point into a new "end range."
- Address tight areas: For joints with restricted flexibility, stretches should focus on gradually increasing the range of motion to bring it into the normal range.
This targeted approach ensures the flexibility program promotes joint balance and functionality without compromising stability or overextending tissues.
In addition to static stretching, other techniques can be utilized to stretch into a new "end range," including ballistic, dynamic, and proprioceptive neuromuscular facilitation (PNF) stretching, such as contract-relax methods.
- Ballistic stretching involves rapid, bouncing movements that use momentum to push a muscle to its limit. However, this method is not recommended as part of any training program due to its higher risk of injury.
- Dynamic stretching, while also involving movement, avoids bouncing and is typically activity-specific. It is an effective warm-up technique, preparing muscles for the demands of the upcoming training session.
- PNF stretching combines passive movements with active (concentric and isometric) muscle actions, often requiring a partner to assist. This technique can be highly effective for improving flexibility when performed correctly.
Incorporating these methods appropriately into a flexibility program can further enhance range of motion while minimizing the risk of overstretching or injury.
Flexibility Prescription Considerations and Guidelines
Following the joint range of motion assessment an appropriate flexibility program should be designed using the F.I.T.T. Principle (Page, 2012):
Frequency
Two to seven days per week per muscle group. Areas of tightness require higher frequency of flexibility training.
Intensity
Stretch to the point of mild to moderate discomfort (a “4 to 6” on a 1-10 RPE scale).
Time or Duration
Stretches should generally be held for 20 to 60 seconds, depending on the goal:
- Extending End Range of Motion: To increase flexibility, the principle of "muscle creep" should be applied (see Additional Considerations below). This involves holding the stretch for approximately 20 seconds, followed by a brief mental relaxation to allow the muscle to adjust. The stretch is then gently deepened and held at the new end range of motion for an additional 20–30 seconds.
- Maintaining Normal Range of Motion: When the goal is to preserve existing flexibility, avoid engaging "muscle creep." Instead, hold a static stretch at the initial end range for the full duration without deepening the stretch.
Tighter areas require more volume to address restricted flexibility. For these areas, two to three total sets of stretching should be performed to optimize effectiveness.
Type
Various types of stretching include:
- Passive (an external force is applied to move the joint, without any muscle contraction)
- Active (the individual actively moves the joint)
- Proprioceptive Neuromuscular Facilitation (PNF)
Stretching Type Comparison
Passive and active stretching
Passive stretching uses an external force, while active stretching uses the individual's own movement.
- Passive: external force
- Active: individual actively moves the joint
PNF
PNF combines passive movements with active muscle actions and may require partner assistance.
- Concentric actions
- Isometric actions
- Contract-relax methods
When performed with the proper frequency, volume, and intensity, all forms of stretching can effectively improve joint range of motion over time. Among these, PNF stretching often yields faster results due to its combination of passive and active muscle engagement. Additionally, stretching joints through multiple angles can further enhance flexibility by addressing a broader range of muscle fibers and movement patterns.
Additional Considerations
Muscles and tendons possess viscoelastic properties, meaning they can both stretch (deform) and resist stretching (stiffness). These properties are key to what allows muscles to "creep" into a deeper stretch when sufficient tension is applied (Ryan, 2010).
Why is this Important?
While the evidence on stretching for injury prevention is uncertain, there is broad agreement that properly performed stretching maintains or improves range of motion (ROM). Conversely, improper stretching techniques fail to yield significant benefits (Guissard, 2006). Unfortunately, many individuals fall short by not holding stretches long enough or by stopping at their initial "end range" without leveraging "muscle creep" to reach a second or third end range. Without these additional efforts, ROM improvements are minimal.
To effectively increase joint range of motion, it’s critical to understand two key concepts:
- The Time Component: Begin by reaching the first end range of motion and holding the stretch for at least 20 to 30 seconds. During this time, consciously relax into the stretch to reduce neural inhibition. This relaxation is essential to progress deeper into the stretch.
- The Muscle Creep Component: Leveraging the muscle's viscoelastic properties and reduced neural inhibition, "muscle creep" allows the muscle to be stretched into a second—and potentially third—end range of motion. This gradual progression is crucial for meaningful ROM improvements.
Muscle Creep Process
Reach the first end range of motion
Extending end range
- 1.Hold the stretch for approximately 20 seconds
- 2.Mentally relax so the muscle can adjust
- 3.Gently deepen the stretch
- 4.Hold the new end range for an additional 20 to 30 seconds
Maintaining normal range
- 1.Stop at the initial end range
- 2.Hold for the full duration
- 3.Avoid deepening into a new end range
Use time and relaxation
Do not stretch hypermobile areas
Progress only when the response is appropriate
Failure to hold stretches long enough (e.g., only 10 seconds), to relax into the stretch, or to explore deeper end ranges often leads to poor outcomes in flexibility programs. These common mistakes are typically the reason stretching "doesn't work" for many people.
With adequate frequency, intensity, duration, and variety in stretching techniques—combined with the intentional use of muscle creep—a well-structured flexibility program can reliably increase joint range of motion, particularly in individuals with movement restrictions.
Summary
This chapter explores two essential components of fitness and movement optimization: trigger point release and flexibility training. Both methods are critical tools for enhancing physical performance, addressing movement restrictions, and maintaining long-term musculoskeletal health.
Trigger point release, also known as self-myofascial release, is a technique to alleviate pain, improve blood flow, enhance joint range of motion, and boost movement efficiency. Its primary mechanism involves the reduction of neural tension rather than the breaking of adhesions or scar tissue, as was previously believed. A comprehensive assessment is emphasized as the starting point for designing a program, with evaluations identifying the most sensitive areas (trigger points) based on subjective feedback. Program design follows the Frequency, Intensity, Time, and Type (F.I.T.T.) principle, advocating daily sessions initially to address discomfort effectively. Over time, frequency can taper to a maintenance schedule as relief is achieved. The intensity of pressure should remain within moderate discomfort levels, and sensitive areas should be targeted for 20 to 30 seconds or longer, depending on individual needs. Tools such as foam rollers and lacrosse balls are chosen based on their surface area and density, allowing for progression or regression as needed.
Flexibility training is equally important for its role in enhancing joint range of motion, supporting movement efficiency, and potentially reducing the risk of injury. With flexibility naturally decreasing over time (aging), regular assessment and training are necessary to maintain or restore balance around joints. Joint range of motion is categorized as normal, hypermobile, or restricted, and assessments also identify asymmetries or areas of discomfort. A properly designed flexibility program incorporates static, dynamic, or proprioceptive neuromuscular facilitation (PNF) stretching techniques tailored to individual needs. The F.I.T.T. principle is again applied, recommending stretching at least two to seven times per week, particularly for tight areas, with stretches held for 20 to 60 seconds. The concept of "muscle creep" highlights the importance of relaxing into a stretch to extend the range of motion incrementally.
The chapter also provides critical considerations for safety and inclusivity. Contraindications, such as avoiding trigger point release in areas with skin conditions or varicose veins, are addressed. Additionally, practical adaptations are offered for individuals with obesity or mobility challenges, including alternative tools and positions to ensure accessibility.
Together, trigger point release and flexibility training are synergistic approaches to improving movement quality and physical health. The strategies outlined in this chapter emphasize evidence-based practices that promote consistent progress and individualization, ensuring these methods can be effectively integrated into diverse fitness and rehabilitation programs.
Recognizing that the Fundamentals of Medical Fitness course is part of a larger ecosystem which includes instructional videos developed to “bring the book to life,” the reader is directed to www.MRFInstitute.org. It would be beneficial to view the videos, as they provide greater clarity to the information presented in this chapter.